Introduction↑
CAUTION
I do not recommend virtualizing TrueNAS any longer, even with a device passthrough.
Plase see my 2025 update for an alternative.
My home server is a Proxmox cluster. Recently, one of the host’s SSDs indicated it needed a replacement.
I run TrueNas SCALE on it by passing through all my hard drives via LSI HBA so that zfs has access to the raw hardware, which makes the migration to a new SSD a bit tricker. For added difficulty, this process assumes the SSD is a NVMe drive on a system with a single m.2 slot.
This article just outlines the steps on how to do it, since it’s not super obvious. Please do not blindly copy paste commands, otherwise you will loose your data. You have been warned.
Names used: sleipnir.lan: Node that stays online. bigiron.lan: Node where we’ll replace a drive.
Note: If you’ve been here before, you might know that I normally don’t write “tutorial” style articles, but I found this obscure and somewhat interesting enough a case study to make an exception. No, I’m not procrastinating on part 2 of bridgefour, you are. I added docker support!
Prepare the server↑
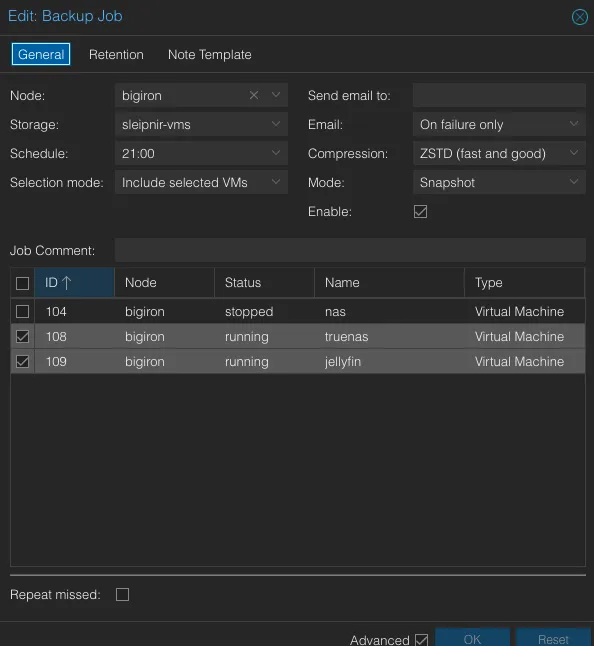
Start by taking snapshots of your VMs and ensure you have backups and send them to your standby/backup server.
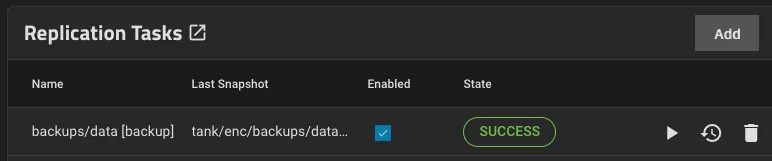
Since the TrueNAS VM doesn’t store any data itself, ensure its replica has a copy of your zfs snapshots, too:
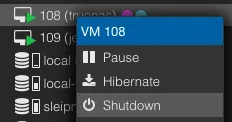
Next, turn off all existing VMs on the host. If any of the VMs runs critical services, migrate them onto a different host (if they’re not HA in the first place).
Lastly, prepare the network for the loss of node in the cluster, e.g. if you run a DNS resolver or any other network software that is not redundant on it.
Back up the zfs root of the host↑
The default zfs pool in Proxmox is called rpool. Create a recursive snapshot.
zfs snapshot -r rpool@new-root-driveConfirm it exists:
root @ bigiron ➜ ~ zfs list -t snapshot | grep new-root-driverpool@new-root-drive 0B - 104K -rpool/ROOT@new-root-drive 0B - 96K -rpool/ROOT/pve-1@new-root-drive 5.12M - 9.73G -# ...This process is almost instant, since it only tracks metadata and doesn’t actually copy any of your data.
Next, send it to a suitable backup location. This can be an external hard drive or your backup server.
zfs send -Rv rpool@new-root-drive | ssh sleipnir.lan zfs recv rpool/bigiron-host-backupAlternatively, on the same server on a different drive:
zfs send -Rv rpool@new-root-drive | zfs recv vms-bigiron/bigiron-host-backup-R is recursive and -v gives useful output:
total estimated size is 153GTIME SENT SNAPSHOT rpool/data@new-root-drive18:09:57 8.27K rpool/data@new-root-drive#...If you get an instant result here, though, maybe consider being skeptical on how your computer actually copied (presumably) hundreds of GiB within seconds. zfs will not warn you that it just copied only the 104K root without -v.
Conceptually, you could also pipe this to a file, but I haven’t tried that myself.
Confirm it exists:
root @ bigiron ➜ ~ zfs list | grep vms-bigiron/bigiron-host-backupvms-bigiron/bigiron-host-backup/ROOT/pve-1 9.52G 1.23T 9.51G /# ...Validate the backup by zfs importing it and poking around in it.
Prepare bootable USB drives↑
Flash a new Proxmox ISO onto a bootable USB drive (balenaEtcher is a good tool).
Prepare the cluster↑
Note: This process will remove the old node and re-add it, since the documentation warns against doing it differently. On paper, you are be able to skip this and restore the entire rpool later. That didn’t work too well for me. See the notes.
On the remaining node, remove the old node. Make sure to set the quorum to 1 first. You won’t need this if you’re actually left with a quorum.
pvecm expected 1pvecm delnode bigironpvecm statusYou might want to clean up /etc/pve/priv/authorized_keys.
Make sure /etc/pve/nodes/ doesn’t contain the node you just removed.
If you don’t do this, you will get into funny state territory:
Note how the node shows up as unavailable, but the server is actually online?
Your cluster doesn’t have consensus as to what’s happening here, and clearly you polling the state of bigiron.lan vs the UI state presented by, presumably, the other node(s) in the cluster differs. Also, all nodes have a quorum vote of 1, so good luck without an actual quorum (i.e., an uneven number of nodes).
Prepare the new SSD↑
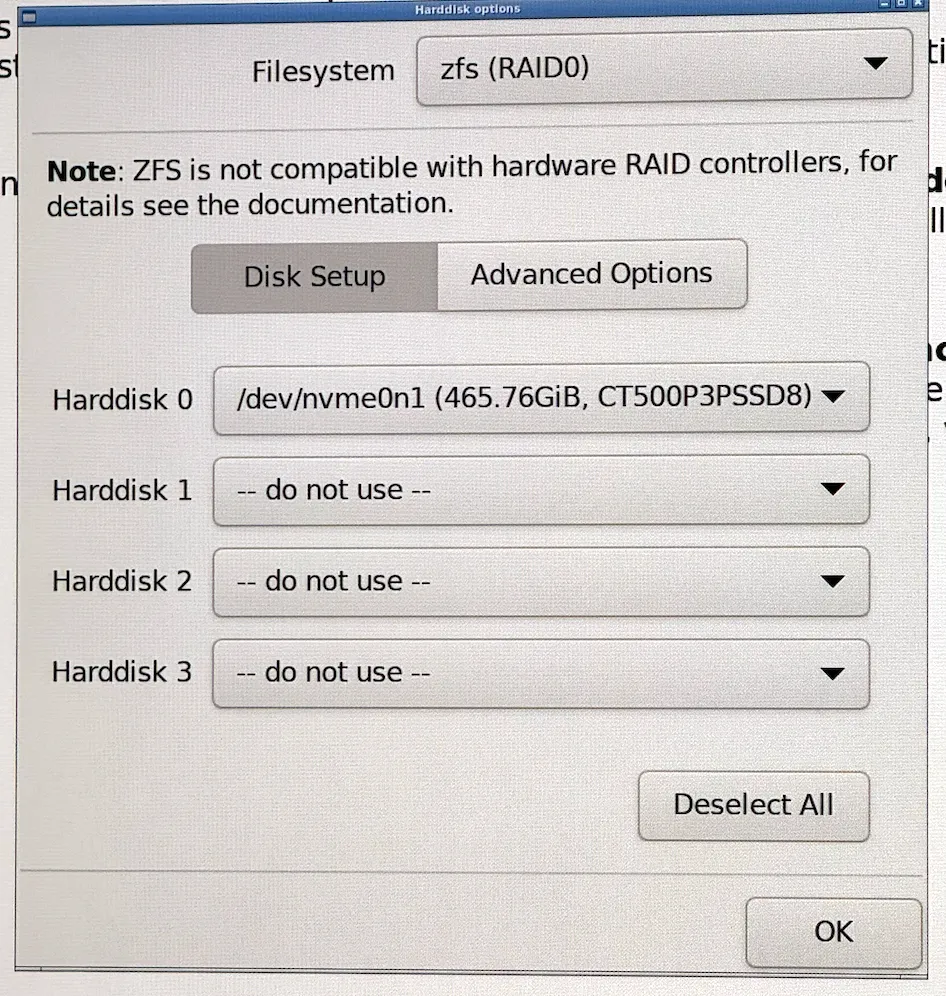
Shut down the server (the cluster will now be degraded I you missed out on the previous step), connect an external screen and other I/O, switch out the SSDs, boot from USB, and install a new Proxmox environment. Ensure to format the drive as zfs.
The system will reboot once it’s done. Poke around on the web UI to make sure everything looks fine.
Restore the backup↑
At this point, you have the new SSD installed, and the snapshot of the old SSD available either on the network or a different drive.
First, import the backup pool if you used an internal drive as backup target.
zpool import vms-bigiron -fzpool import boot-pool -fConfirm. Do the names match? Do the sizes match?
root@bigiron:~# zpool listNAME SIZE ALLOC FREE CKPOINT EXPANDSZ FRAG CAP DEDUP HEALTH ALTROOTboot-pool 63G 6.92G 56.1G - - 8% 10% 1.00x ONLINE -rpool 464G 1.18G 463G - - 0% 0% 1.00x ONLINE -vms-bigiron 1.81T 540G 1.29T - - 2% 29% 1.00x ONLINE -Also check zfs list -t snapshot.
Next, we’ll selectively grab the data dataset from the backup and write it to the new rpool.
nohup sh -c "zfs send -Rv vms-bigiron/bigiron-host-backup/data@new-root-drive | zfs recv -Fuv rpool/data" &Beware of the -F flag:
If the -F flag is specified when this stream is received, snapshots and file systems that do not exist on the sending side are destroyed.
-v is what you think it is and -u just doesn’t mount the result.
grep "total estimated" nohup.out should give you something close to total estimated size is 153G from before. Mine was 135GB.
At this point, your brand new SSD should have a pool called rpool that contains all your old data and VMs. Do the usual validation. I also copied my nohup.out file.
Now, and this is critical, confirm that no two mountpoints overlap:
zfs listFor me, this happened:
root@bigiron:~# zfs list | grep -E "/$"rpool/ROOT/pve-1 1.32G 336G 1.32G /vms-bigiron/bigiron-host-backup/ROOT/pve-1 9.52G 1.23T 9.51G /Note the two identical mount points. I have no idea why this is allowed in zfs.
This caused:
root@bigiron:~# systemctl list-units --failed UNIT LOAD ACTIVE SUB DESCRIPTION● chrony.service loaded failed failed chrony, an NTP client/server● lxcfs.service loaded failed failed FUSE filesystem for LXC● modprobe@drm.service loaded failed failed Load Kernel Module drmAnd a lot of erratic behavior.
Fix by this by:
zfs set mountpoint=/vms-bigiron/bigiron-host-backup/ROOT/pve-1 vms-bigiron/bigiron-host-backup/ROOT/pve-1And reboot.
Next, confirm everything’s happy via
root@bigiron:~# systemctl list-units --failed UNIT LOAD ACTIVE SUB DESCRIPTION0 loaded units listedConfirm the HBA is set up correctly↑
Since we only restored the data dataset, we need to do this again. ssh into the new-old machine. If you’re brave and restored the entire rpool in the previous step, this will all be set.
DANGER
Make sure to blacklist the HBA on the host. See the Wiki for details.
/etc/default/grub↑
Should contain the line:
GRUB_CMDLINE_LINUX_DEFAULT="quiet amd_iommu=on iommu=pt"For AMD. For Intel:
GRUB_CMDLINE_LINUX_DEFAULT="quiet intel_iommu=on iommu=pt"Run:
update-grub2This will tell the kernel to use the CPU’s Input-Output Memory Management Unit (IOMMU). iommu=pt enables this only for pass through devices.
/kernel/commandline↑
Should exist and contain only
root=ZFS=rpool/ROOT/pve-1 boot=zfs quiet amd_iommu=on iommu=ptFor AMD. For Intel:
root=ZFS=rpool/ROOT/pve-1 boot=zfs quiet intel_iommu=on iommu=ptRun:
pve-efiboot-tool refreshFor the record - I stole this from the reddit post from the acknowledgments section - I actually doubt this does anything.
/etc/modules↑
Should exist and contain only
# /etc/modules: kernel modules to load at boot time.## This file contains the names of kernel modules that should be loaded# at boot time, one per line. Lines beginning with "#" are ignored.vfio vfio_iommu_type1 vfio_pci vfio_virqfdOn both Intel and AMD.
Run:
update-initramfs -u -k allThis loads the required kernel modules for PCI passthrough.
Now reboot the box.
Fix the cluster↑
If you run a single-node cluster, skip this. Or go on the internet and buy a couple of servers. I suggest the latter.
Since we removed the new-old node from the cluster earlier, all we need to do is the following on bigiron.lan:
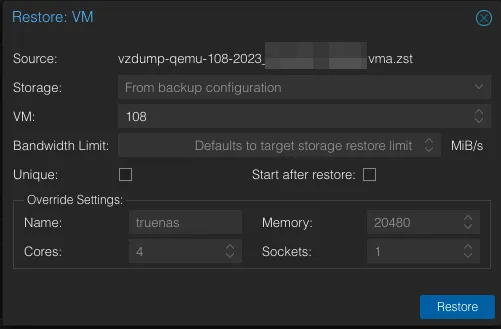
pvecm add sleipnir.lanNext, go to your backups in the Proxmox UI and restore the VMs. Again, if you restored the entire rpool, they should just show up.
Lastly, run an update.
echo 'deb http://download.proxmox.com/debian/pve bullseye pve-no-subscription' >> /etc/apt/sources.listapt-get updateapt-get upgradeValidate the system↑
Ensure all disks exist. The Proxmox UI should not list the disks controlled by the HBA!

Ensure all zfs pools exist. In my case, I replaced a 240G SSD with a 500G SSD, so that’s easy:

Ensure all VMs exist.
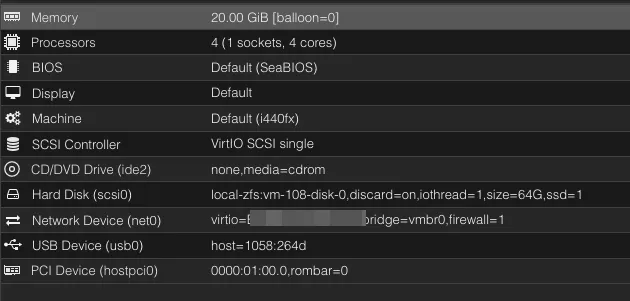
Ensure your TrueNAS instance has the proper passthrough settings:
Start the VMs and ensure they do what you want them to do.
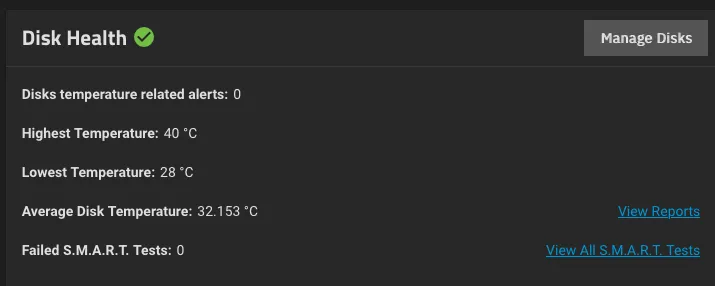
Especially for TrueNAS, check that the pool(s) exist and you can access S.M.A.R.T attributes as a proxy for the passthrough working as indented.
You’re done! (& Notes)↑
Congratulations! Your comically over-engineered server is back online. Isn’t zfs neat?
On a side note - if you think you can just restore rpool wholesale (i.e., not just /data), this might break the cluster. The Proxmox docs warn against this. I tried that and couldn’t get it to work. In no particular order:
- No
ntpservice would work, with odd errors I attribute toselinuxorAppArmor(randomly no access to thepidfile) [quorum] crit: quorum_initialize failed: 2CAN'T OPEN SYMLINK (/etc/cron.d/vzdump)Permission denied - invalid PVE ticket
I do encourage you to try, though. Theoretically, I don’t really see a reason why this shouldn’t work. I believe my main problem was having overlapping / rootpoints and since Proxmox nodes should be cattle, not pets, quickly restoring a couple of VMs wasn’t the end of the world.
Acknowledgements↑
This thread was the main source of inspiration for when I originally set up the card.
This article does something similar, but not quite the same (it doesn’t use PCI passthrough or m.2 drives). It was useful to confirm that what I was planning to do here was feasible.
And of course, the official docs.