Introduction↑
For the past 4 or so years, I’ve been using WordPress to push content to this blog. I originally chose it because my knowledge of anything to do with Web and Mobile Development is spotty at best - and because “back in the day”™, it was the only CMS I was somewhat familiar with.
Maybe you’ve seen the sluggish mess that the blog is - and today, we’ll change it.
Pain Points↑
The issues I’ve had with WordPress were numerous, but to name a few:
- You have to be online
- A complicated setup to keep PHP, MariaDB, nginx and other components working
- Several security issues in the past
- A horrible WYSIWYG editor, without any markdown support, save for external plugins
- No
vibindings, such as inVS Code, or, well,vim- everything is mouse-driven - The entire thing is slow - navigating, updating, preview
- Constant bot-spam in the comments
- No version control
- No decent template model
- No external contributors
- No native syntax highlighting; Plugins have a tendency to mess things up
- 2.5MB transfer and 47 requests / network activity per page load
- Up to 40s (!) loading times on slow connections
While I’m sure somebody who is super familiar with WordPress can figure some of those out, but one thing that comes to mind is this horrifying contraption for running Wordpress.
For comparison: My actual website, which is plain
HTMLandCSS, loads 32KB (most of which is the little Tuxfavicon) and hence in under 0.3s on a similarly horrible connection.
Workflow↑
My workflow, however, was the real pain point (I accept judgment for this):
- Write the content locally in Sublime or vim, ignoring formatting, so I don’t have to deal with network issues and can work offline
- Copy-paste the code to WordPress, waiting for it to mess up
- Manually add the code with an external SyntaxHighlighter plugin
- Edit the generated HTML to fix any messed up code formatting
- Cry and drink
- Repeat this every 3 months
In other words, its worse than writing a Confluence page on dial up.
Accepting feedback and contributions is also difficult - while I have added feedback in the past, it requires me to do it. With a more standardized CI/CD process, it would be trivial to simply accept merge requests.
But since the only person to blame here is me, I now finally managed to fix it.
The Idea↑
Using a static side generator is a really old idea and I don’t claim any intellectual points for it. However, I am documenting this process for the sake of documenting it.
The idea here is to have a workflow that looks like this:
- Write posts in markdown. Add code in pre-defined blocks/shortcodes.
- Store images locally
- Push to Git (GitHub, GitLab)
- Deploy to the web server using a CI/CD flow
Hugo↑
Hugo is a simple static-site generator written in golang. After thinking about Jekyll and the joys of Ruby, I’ve decided to go with the simpler alternative, as it only requires one binary, has a relatively simply syntax, a decent suite of tools and plugins, nice, open source / MIT licensed templates and has been in my bookmarks since I saw it on HackerNews ages ago. There are other alternatives available, but after playing around with Hugo for a bit, it seemed exactly what I want.
Install Hugo↑
We just grab the latest binary for a 64-bit Linux from GitHub, unpack it, and store it somewhere on the $PATH.
wget https://github.com/gohugoio/hugo/releases/download/v0.70.0/hugo_0.70.0_Linux-64bit.tar.gztar xvf hugo_0.70.0_Linux-64bit.tar.gzWe can then set up a page:
hugo new site chollinger-blogAfter some small edits to the config.toml, we should be good to go and only need content.
baseURL = "https://chollinger.com/blog"languageCode = "en-us"title = "Christian Hollinger"theme = "ananke"Exporting all old posts↑
I want to export all old blog posts to Markdown. There’s a great little tool by lonekorean on GitHub.
All we need is an export of WordPress and run:
git clone https://github.com/lonekorean/wordpress-export-to-markdowncd wordpress-export-to-markdownnpm installnode index.jsAfter that, we can copy the generated files to the posts directory.
There are other tools available here, but since I’ve already customized WordPress quite a bit, the above export was a possible route. Your mileage may wary.
Testing↑
Start a dev server that automatically refreshes once we save a file:
hugo server -D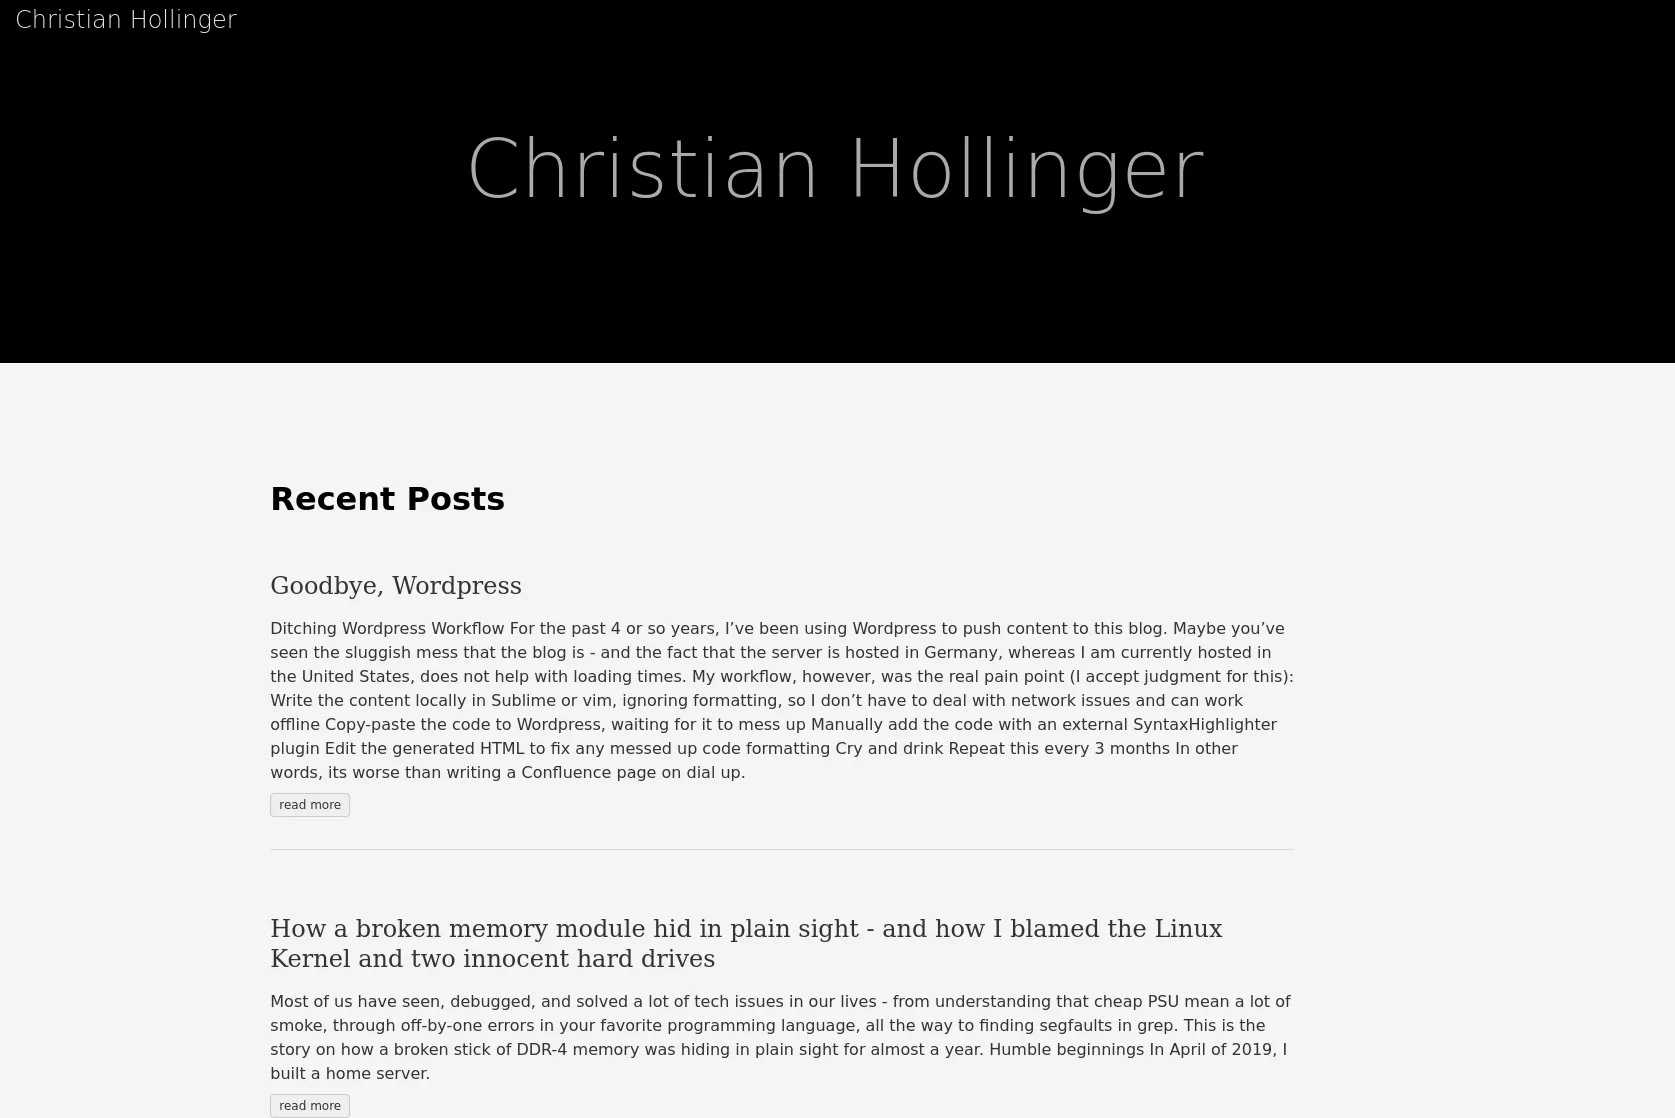
Pretty? Well..
Themes↑
We also need a real theme for the page.
My personal decision criteria for a theme were the following:
- No external dependencies to CDNs, googleapis, Google Analytics, trackers…
- Simplistic interface, without omitting information
- Fast load times even on slow connections
I chose hugo-ink by knadh, but customized it quite heavily to match some of my requirements. This resulted in a fork called ink-free.
Adjustments can be easily made using fairly standard HTML (w/ Hugo’s injections) and CSS, which I found easy to figure out, despite being anything but a Web Dev. :)
The changes made to that theme were the following:
- Removed all references to Google’s font-CDN
- Removed Analytics code, even if it was controlled by a variable
- Modified the CSS to
- Order all tags inline, as opposed to as a list
- Change the background color for Syntax Highlighting, otherwise we’re looking at grey code on a grey background
- Added some classes for a Back button
- Added a Back button to all posts
- Added a TOC, controlled by a variable, to all posts
- Added a word count, tags, and an approximate read time to the overview
- Added very serious, random messages at the end of the posts
Most of it was simple HTML and CSS updates, like this update for the Back button:
.tag-li {    display:inline !important;}
.back {    padding-top: 1em;    font-size: 1em;}
The last part with the random messages was interesting, as Hugo / the underlying go Syntax allows you to pipe commands:
<div class="back"> {{ if isset .Site.Params "footers" }} {{ if ne .Type "page" }} Next time, we'll talk about <i>"{{ range .Site.Params.footers | shuffle | first 1 }}{{ . }}"</i>{{ end }} {{ end }} {{ end }}</div>And I am reasonably happy with the result:
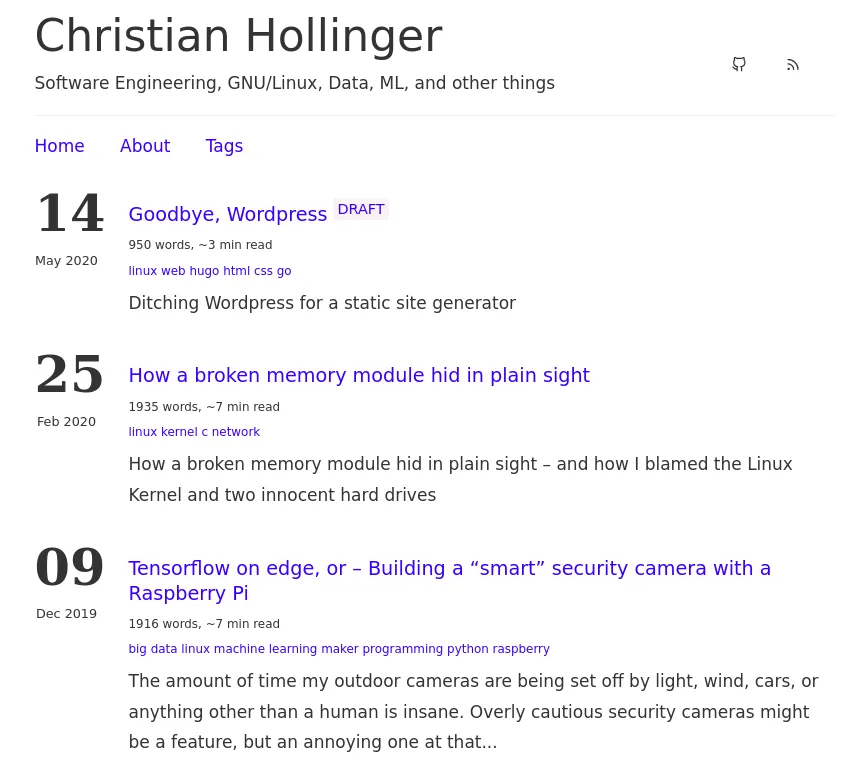
Feel free to check out the theme’s repository here: https://github.com/chollinger93/hugo-ink
Adjusting exported blog posts↑
Due to my rather interesting WordPress configuration, the exported posts from above need some help.
The issues I’ve found where the following:
- GitHub Gits are not rendered
- Internal Syntax Formatting caused everything to be escaped with
\, breaking code - Headlines are missing
- Tags are missing
- Descriptions are missing
Gists↑
Gists get inserted as such:
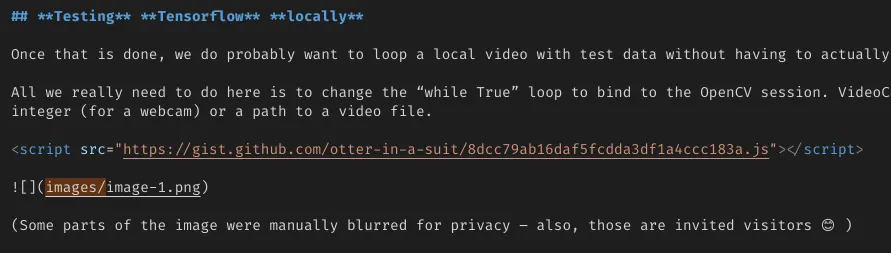
And look like that:
Whereas we are expecting:

We can fix that by replacing
<script src="https://gist.github.com/chollinger93/8dcc79ab16daf5fcdda3df1a4ccc183a.js"></script>with
{{</* gist chollinger93 8dcc79ab16daf5fcdda3df1a4ccc183a */>}}But, of course, doing that by hand would be tedious, so we can script that:
grep "gist.github.com" *.md | while read -r line ; do guser=$(echo "${line}" | cut -d'/' -f4) gist=$(echo "${line}" | cut -d'/' -f5 | sed -E 's/(\.js).+//g') echo "$gist" repl="{{/* gist "${guser}" "${gist}" */>}}" # Get line number ln=$(grep -n "$line" *.md | cut -d : -f 1) # Replace echo "Replace line $ln with ${repl}" sed -Ei "$ln s#.*#${repl}#g" *.mddoneShortcuts↑
I’ve also added a Visual Studio Code shortcut in keybindings.json to insert Hugo’s Syntax Highlighter blocks:
[ { "key": "ctrl+1", "command": "editor.action.insertSnippet", "when": "editorTextFocus", "args": { "snippet": "{< highlight bash \"linenos=table\" >}" } }, { "key": "ctrl+2", "command": "editor.action.insertSnippet", "when": "editorTextFocus", "args": { "snippet": "{< / highlight >}" } }]Permalinks↑
In order to avoid breaking links, and hence any bit of SEO we might have, we need to make sure that either all posts follow the same naming schema - they do in my case - or add a setting in config.toml:
[permalinks] posts = "/:year/:month/:title"In order to ensure this is indeed a 100% match, I wrote this horrible little go script to compare both the local (after hugo build) and remote RSS feeds:
package main
import (  "os"  "fmt"
  "github.com/mmcdole/gofeed")
func mapToUrl(feed *gofeed.Feed) map[string]string {  output := map[string]string{}  for _, post := range feed.Items {    output[post.Link] = post.Title  }  return output}
func readFeed(path string) *gofeed.Feed {  fp := gofeed.NewParser()  //remtoteFeed, _ := fpR.ParseURL("https://chollinger.com/blog/feed")  file, _ := os.Open(path)  defer file.Close()  feed, _ := fp.Parse(file)  return feed}
func compareUrls(local, remote map[string]string) bool {  allFound := true  for k, _ := range local {    fmt.Println(k)    if title, ok := remote[k]; ok {      fmt.Printf("Found %s\n", title)    } else {      fmt.Printf("Could not find %s locally, url: %s\n", title, k)      allFound = false    }  }  return allFound}
func main() {  // Remote  remoteFeed := readFeed("./wordpress.xml")  remote := mapToUrl(remoteFeed)
  // Local  localFeed := readFeed("../public/index.xml")  local := mapToUrl(localFeed)
  // Compare  fmt.Println(compareUrls(local, remote))}
Which did find some errors.
christian @ pop-os ➜ sbin git:(master) ✗ go run check_rss.go | grep "Could not"Could not find locally, url: https://chollinger.com/blog/2020/02/how-a-broken-memory-module-hid-in-plain-sight-and-how-i-blamed-the-linux-kernel-and-two-innocent-hard-drives/Could not find locally, url: https://chollinger.com/blog/2019/12/tensorflow-on-edge-building-a-smar-security-camera-with-a-raspberry-pi/Which I was able to fix after deploying the first version of this article. Psst, don’t check the Git commits. :)
There were more adjustments that needed to be done - like re-adding videos - but for the most part, everything was working fine. I will spare you the tedious details.
Deployment↑
For the deployment, the goal is to deploy the static HTML to the existing webserver over at chollinger.com, which runs nginx and docker containers. Externally hosted sites, like GitHub Pages, are an option, but I would like to keep as much “in house” as possible.
We have 2 convenient (and free for Open Source) options for CI/build servers: travis and GitHub Actions. In this case, we’ll be using GitHub Actions, as it avoids having yet another external dependency.
Our flow will look like this:
- Checkout the master branch
- Update the theme via its submodule
- Download hugo
- Build the static HTML/CSS/JS
- Deploy via SCP to a specific
chrootjail - Do any other action, like updating a
dockerimage, on the server (although nothing stops you from doing this in the pipeline)
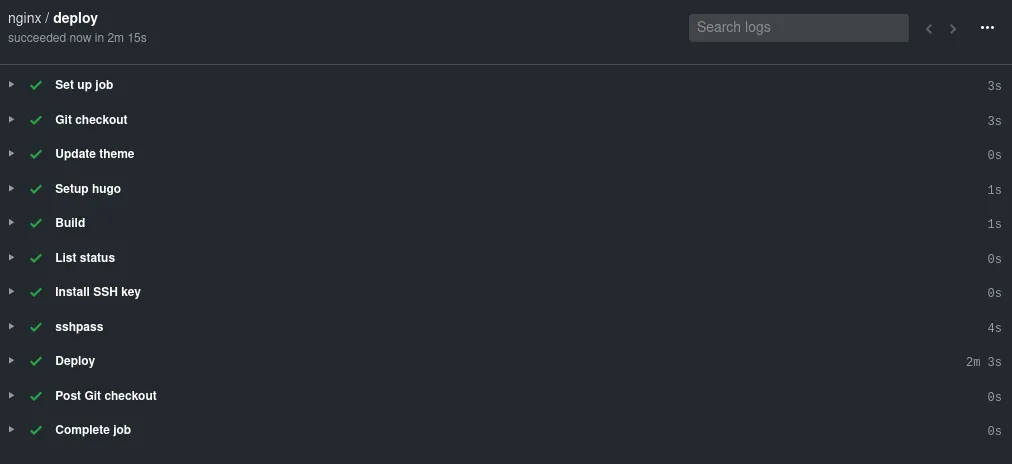
workflow.yml↑
We’ll create a .github/workflows/workflow.yml file as such:
name: nginxon:  # Trigger the workflow on push or pull request,  # but only for the master branch  push:    branches:      - master  pull_request:    branches:      - masterjobs:  deploy:    runs-on: ubuntu-18.04    steps:      - name: Git checkout        uses: actions/checkout@v2
      - name: Update theme        # Update themes        run: git submodule update --init --recursive
      - name: Setup hugo        uses: peaceiris/actions-hugo@v2        with:          hugo-version: "0.70.0"
      - name: Build        run: hugo --minify -d blog
      - name: List status        working-directory: ${{ github.workspace }}        run: ls -larth blog        continue-on-error: true
      - name: Install SSH key        uses: shimataro/ssh-key-action@v2        with:          key: ${{ secrets.KEY }}          name: id_rsa # optional          known_hosts: ${{ secrets.KNOWN_HOSTS }}
      - name: sshpass        run: sudo apt-get install -y sshpass
      - name: Deploy        env:          PASSWORD: ${{ secrets.PASSWORD }}          USERNAME: ${{ secrets.USERNAME }}          HOST: ${{ secrets.HOST }}          TARGET_DIR: ${{ secrets.TARGET_DIR }}        run: sshpass -p "$PASSWORD" scp -r blog/ "$USERNAME"@"$HOST":"$TARGET_DIR"
You can use some of the pre-configured SCP Actions instead of using
bash. I had issues with those and since all Actions I’ve found either don’t support key passphrases or don’t supply proper debug logs, I gave up and used abashaction for deployment.
If you have any idea what “Exit code 1”, despite a successful connection on the server (as per
syslosganfauth.log), means, do let me know!
rssh↑
We’ll deploy via SCP, but only with a specific user that has restricted permissions.
Add the user:
useradd -m -d /home/github githubpasswd githubsu githubMake the user’s home owned by root:
sudo chown -R root:github /home/githubsudo chown github:github /home/github/.ssh# + Any folders the deployment needsNext, let’s compile rssh, an scp/sftp only shell.
wget http://prdownloads.sourceforge.net/rssh/rssh-2.3.4.tar.gz?downloadtar -xvf rssh-2.3.4.tar.gzAnd build:
# Build from source./configuremakesudo make installWe need to allow the user access, so we need to edit /usr/local/etc/rssh.conf as such:
user = "github:022:00001:/path/to/chroot"This translates to:
username: The username of the user for whom the entry provides optionsumask: The umask for this user, in octal, just as it would be specified to the shellaccess bits: Five binary digits, which indicate whether the user is allowed to use rsync, rdist, cvs, sftp, and scp, in that order. One means the command is allowed, zero means it is not.path: The directory to which this user should be chrooted (this is not a command, it is a directory name). See chroot_path above for complete details.
Please see the man page.
Especially setting up a chroot is a bit more involved than setting a single config file, so be advised to read through the appropriate man pages and CHROOT in the rssh source directory.
Make sure the users exists in AllowUsers under /etc/ssh/sshd_config
Edit the SSH config:
vim /etc/ssh/sshd_configEnsure that the user is in the
AllowUserdirective. At this point, you might want to think about a separatersshandsshgroup.
And restart the SSH daemon:
service sshd restartFinally, change the user’s shell to /bin/rssh:
usermod -s /usr/bin/rssh githubOf course, at this point, you will also need to generate your ssh keys (use PEM for GitHub Actions, as I’m pretty sure the Ubuntu image used by their bash action uses a weird openssh version), set up whatever flow you need to actually get the HTML served (e.g., docker) but I will skip over that part in the interest of time.
The result↑
Well, if you’re here reading it, judge for yourself! While it is certainly not as flashy as the old WordPress template, it does offer considerable improvements in performance: This blog post should only transfer about ~500KB (the majority of which are inline images), load some minimal Javascript and CSS, and be on your screen in an instant.
Conclusion↑
I for one am pretty happy to have made this change. Granted, I don’t get a ton of traffic here (but since I don’t run Analytics, I don’t really know), but for my own sanity, this new workflow is clean, easy, and collaborative.
But despite few views, blogging is fun! Every time I write something, my goal is always to learn something - it doesn’t matter if is something complex (like understanding some ML/Statistics theory) or something simple like today, where I had to get back into some minimal web development and “DevOps” (even though I thoroughly hate the term).
Having this new setup allows me to blog more and spend more time on writing both code and posts, and less on headaches through WordPress. Shorter loading times should cause less frustrations for everyone involved and not being locked-in within WordPress (but rather, having version-controlled markdown files) allows for a more open environment.
I can only implore you to try it yourself - blogging, that is - and if you want to use GitHub + Hugo + Nginx (+ Docker), maybe this helps.